 RetailOS · POS Manual
RetailOS — Point of Sale (POS) Manual
A hands-on guide to running the till: setting up registers, opening and closing cash sessions, selling, taking payment, reprinting receipts, handling returns, and working offline.
Base URL:https://goretailos.comPOS terminal:/admin/pos· Registers & cash:/admin/registers· Orders & returns:/admin/orders· Offline sync:/admin/syncThis is the POS-focused companion to the full User Manual and the Usage Guide.
1. Who can use the POS, and what a register is
- Who — the POS is available to Owner, Admin, Manager and Cashier roles. Accountant / Inventory / Staff roles do not sell.
- Register — a register (or "till"/"drawer") is the point money is taken at. Every sale, cash movement and cash session belongs to a register. A shop can have several registers (e.g. one per counter), each optionally bound to a branch.
- Assignment — a cashier must be assigned to a register before they can open its session (managers can open any register). Manage registers and assignments in Registers & Cash.
Tip — install it as an app. The POS runs as a Progressive Web App: on the till device open /admin, then Install (Chrome/Edge address bar) or Add to Home Screen (iPad Safari). It launches full-screen like a native terminal and keeps working through Wi-Fi drops. See the Usage Guide → Installing the POS for the full setup.
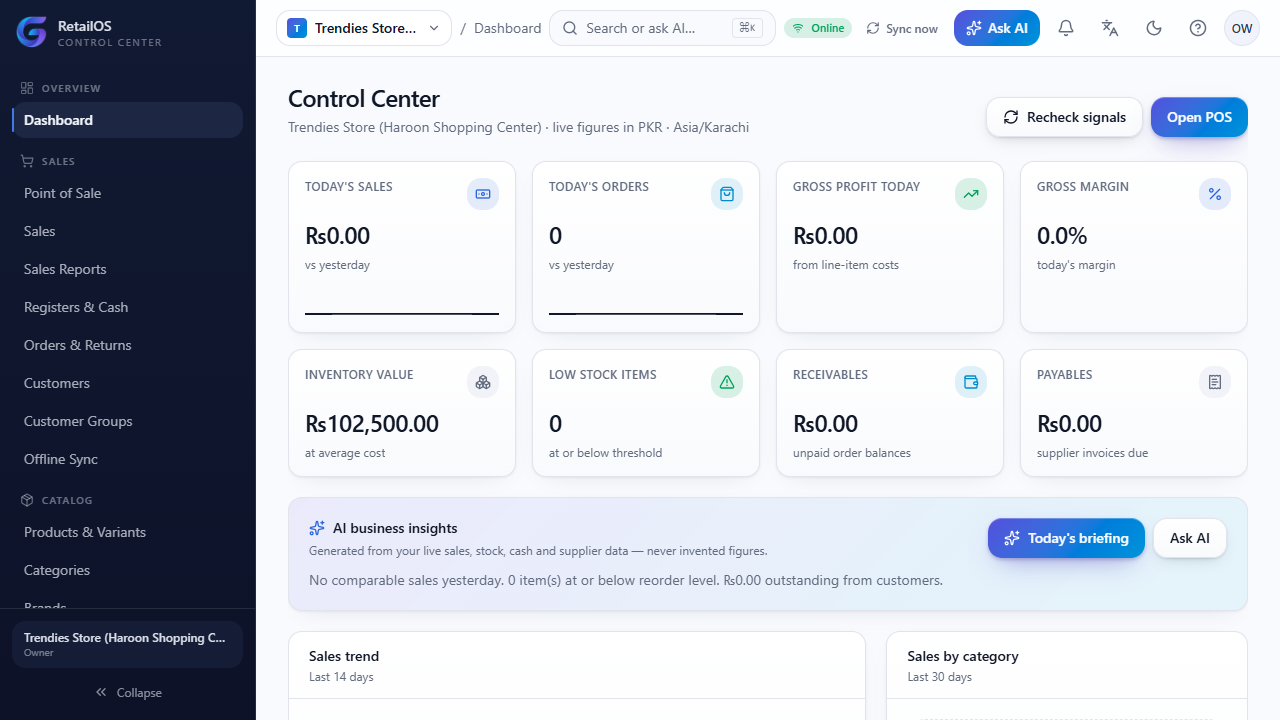
2. Opening the register (start of shift)
You must open a cash session before you can complete a sale. The session tracks every cash movement from open to close so the drawer can be reconciled.
- Open the terminal at
/admin/pos. - In the session bar at the top, pick your register.
- Enter the opening float — the cash you're starting the drawer with (count it first).
- Select Open session.
Rules:
- Only one open session per register at a time. If the register already has an open session you'll be told to close it first.
- Non-managers can only open a register they're assigned to.
- The session bar then shows the register, the open-session state, and the online / offline and sync badges.
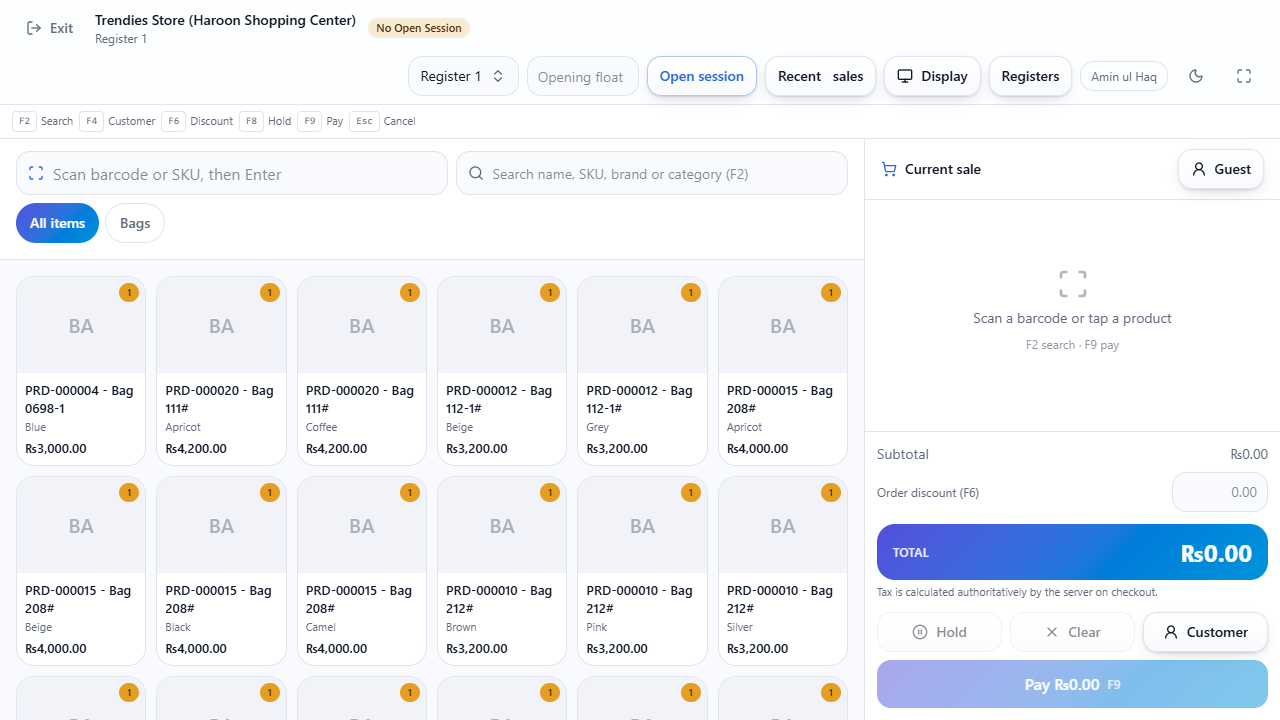
3. Selling — the terminal
The terminal is a full-screen workspace: catalog on the left, cart on the right (a slide-in sheet on phones).
Finding items
- Scan — keep the scan field focused and scan a barcode, or type a barcode/SKU and press Enter. The item drops straight into the cart.
- Search (F2) — fuzzy search by name / SKU / brand / category. Use ↑ ↓ ← → to move the highlight and Enter to add the highlighted item.
- Category chips — tap a category to filter the product grid. Live stock badges show what's available.
Only "Available for sale" items appear here. Products, categories and brands that aren't marked Available for sale (internal-only items such as raw materials or packing supplies) do not show up in the POS product grid, search or category chips. They stay in inventory and purchasing — they just can't be sold at the till.
Overselling into negative stock is limited to permitted roles. By default the till stops you adding more of a stock-tracked item than is on hand. Only roles your shop has permitted (Settings → Inventory → "Who can oversell (negative stock)", default Owner / Admin / Manager) may push a line past available stock; for everyone else the quantity is capped at what's in stock. The server enforces this too, so it can't be worked around. (The shop-wide Allow negative stock toggle governs the online store checkout, not the till.)
The cart
- Quantity — use the − / + steppers on each line.
- Line discount (F6) — a discount on a single line.
- Order discount — a discount across the whole sale (spread evenly across lines when the sale posts).
- Attach customer (F4) — link the sale to a customer (or leave it as a guest sale).
- Hold / resume (F8) — park a sale to serve someone else, then resume it. Held sales live on the device.
Keyboard shortcuts
| Key | Action |
|---|---|
| F2 | Focus search |
| F4 | Attach / change customer |
| F6 | Apply a discount |
| F8 | Hold the current sale |
| F9 | Open the payment screen |
| Esc | Cancel / close the current panel |
The cart prices tax per line — each item uses its own tax rate, or the shop's default (inclusive or exclusive) — so the Total you collect matches exactly what the server posts. The server still re-validates every sale authoritatively when it's completed.
Customer-facing display (second screen)
Show the customer the bill as it's built. In the POS toolbar select Display — a full-screen customer display window opens; drag it onto a second monitor or customer-facing screen at the counter.
- Every item appears with its price and running total the moment it's scanned, with the newest line highlighted.
- The big Total updates live after each item.
- When you take payment, it switches to a Thank you screen showing the amount paid and the change due, and returns to a welcome screen once you close the receipt.
It's a read-only mirror — it never changes the sale. It runs on the same device/browser as the till (open it from the POS on that machine), works offline, and shows nothing to anyone who opens the page on a different device.
4. Taking payment
- Press F9 (or Pay) to open the payment sheet. It shows the Total due.
- Pick a payment method tile (Cash, Card, Bank, etc.).
- For split payments, use Split payment to add more rows — the sheet shows Allocated, Remaining and Change due live.
- Press Complete sale. The button shows Processing… while the sale posts, and can't be double-clicked.
Payment rules:
- The payment total must cover the order total (you can't under-pay).
- Cash over-tender is fine — hand over more cash than the total and the sheet shows the change due; the drawer records the net (cash in − change out). Example: a 600 sale, customer gives 1100 → 500 change, drawer nets +600.
- Non-cash tenders can't exceed the total — you can only give change from cash, so a card/bank amount must not be more than what's owed.
On success you get the receipt screen (and, if offline, a "Saved offline" confirmation).
Credit / udhaar (pay later)
If your shop allows it, a permitted user can complete a sale without full payment and let the customer pay later ("udhaar"). In the payment sheet, tick Credit sale (udhaar / pay later), then press Complete credit sale — you can take part of the money now or none at all, and the unpaid balance is booked to the customer's account.
- A customer is required. You can't put a guest sale on credit — attach a customer (F4) first, or the sale won't complete.
- The credit limit is enforced. The customer's existing unpaid balance plus this sale can't exceed their credit limit (set on the customer record;
0= unlimited). A manager can tick Override the customer's credit limit to go past it. - Online only. Credit sales are confirmed on the server, so they can't be taken while offline.
- Settling up later. When the customer pays, record it from Sales (
/admin/sales) → open the sale → Record payment (see the User Manual).
Whether credit is available at all, and which roles may use it, is set in Settings → Customers & credit.
5. Receipts
- Print a 58 mm or 80 mm thermal receipt (plain-text, ESC/POS-style), with a browser print fallback if no thermal printer is configured.
- Reprints are available from the order later (see §8).
- Configure the printer per device in Settings → Receipts (printer type, paper width, bridge URL, auto-cut, cash-drawer kick). Printer settings are stored on the device, not the shop.
6. Cash in / cash out during the shift
Money sometimes moves in or out of the drawer outside of sales — a float top-up, a payout, or a cash expense. Record these so the drawer still reconciles at close.
From Registers & Cash → the open session panel:
| Type | Use it for |
|---|---|
| Cash in | Adding cash to the drawer (e.g. a float top-up). |
| Cash out | Removing cash (e.g. a payout, banking). |
| Expense | A cash purchase — also posts to the ledger under the chosen expense category. |
Each movement takes an amount and an optional note. Only the session's opener or a manager can record movements.
7. Closing the register (end of shift)
- Go to the session (POS session bar Close session, or Registers & Cash).
- Count the drawer and enter the Counted cash — this is required; you can't close with a blank amount (type
0if the drawer is genuinely empty). - Close. The system computes the variance.
Expected cash is calculated as:
opening float
  + cash sales
  − cash refunds
  + cash in
  − cash out
  − cash expenses
The close screen shows the full reconciliation — Opening, Cash sales, Refunds, Cash in, Cash out, Expenses, Expected, Counted, and the Difference. Only the opener or a manager can close. A discrepancy raises an alert for a manager to review (flagged critical if it's more than ~5% of expected).
8. Recent sales, the order ledger & reprints
- On the till — recently completed and held sales are reachable from the POS (recent-sales / held-sales panel) so you can resume or reprint quickly.
- Full ledger — every sale (POS, online and AI) lives in Orders, returns & payments. Search by order number or customer contact, filter by status / payment / channel / date, and page through them. Open an order to see its lines, payment status and to reprint the receipt.
9. Returns & refunds
Returns are processed from the order, not the till screen.
- Open the order in Orders, returns & payments.
- Choose Full return & refund.
What happens: the returned items are restocked, a refund is issued (cash refunds re-enter the open drawer), and the sale's revenue/tax/COGS are reversed in the ledger — all in one step.
You can't refund an order that was never paid. For an unpaid order (e.g. a Cash-on-Delivery online order that wasn't collected) the refund option is hidden and the server blocks it — there's no money to give back. Cancel such an order instead.
10. Offline mode & sync
The POS is offline-first: if Wi-Fi drops (or a checkout call fails), it keeps selling.
- Prime first, on Wi-Fi. Open the POS online once at the start of a shift so it caches the catalog, prices and barcode index for the shop.
- Selling offline — sales are computed on the device and queued (each carries a unique
local_uuidso syncing can't create duplicates). The session bar shows the offline badge and the queued count. - Reconnecting — queued sales sync automatically and duplicate-safe when you're back online. The server re-prices authoritatively; if a price or tax changed while you were offline, the customer keeps the amount actually charged and the difference is recorded as a variance rather than silently rewritten.
- Conflicts — a manager resolves any price/tax variances or rejected sales in the Offline Sync console (Accept / Reject / Retry).
11. Troubleshooting
| Problem | What to do |
|---|---|
| Register not in the list | Ask a manager to create it and assign you to it in Registers & Cash. |
| "Register already has an open session" | Someone else opened it — close that session first, or use a different register. |
| Can't complete a sale — payment doesn't match | The total tendered must cover the order total. Over-tendering cash is fine (you'll see change); a card/bank amount can't exceed the total. |
| Close button won't work | Enter the Counted cash amount first — it's required (use 0 for an empty drawer). |
| Nothing loads offline | You never primed the cache online, or you're in a browser tab instead of the installed app. Reconnect, open the installed app, load the POS once, then retry. |
| A sale is stuck "syncing" / rejected | A manager resolves it in the Offline Sync console. |
| Refund option missing on an order | The order was never paid — there's nothing to refund; cancel it instead. |
| No "Credit sale" toggle on the Pay screen | Credit sales are off for the shop, or your role isn't permitted. An owner/admin enables it in Settings → Customers & credit. |
| "Credit limit exceeded" when completing | The customer's outstanding balance + this sale is over their limit. Take more upfront, raise the customer's limit, or have a manager tick Override the customer's credit limit. |
| Can't add more than the stock on hand | Overselling into negative stock is restricted — ask a manager, or a permitted role (Settings → Inventory → who can oversell) to complete the sale. |
This page renders POS_MANUAL.md. See also the full User Manual and the Usage Guide.